|
|
On a nice sunny day in July, Judi and I were leisurely heading up PCH on a SoCal caravan destined for some back roads, a BBQ at the Vivas’ and an overnight stay in Santa Maria. A few miles north of Santa Barbara, I heard a clunk and checked my gauges to discover that my tachometer wasn’t working. It appeared that I had thrown a fan belt. Our Solid Axle group got off at the next exit and to my surprise my harmonic balancer was resting on the lower radiator shroud, still held in place by the fan belt. It was amazing that it didn’t do any major under hood damage or, worse yet, damage to the cars behind me. We called AAA for a tow and an exciting ride back to the barn.

|
 |
|
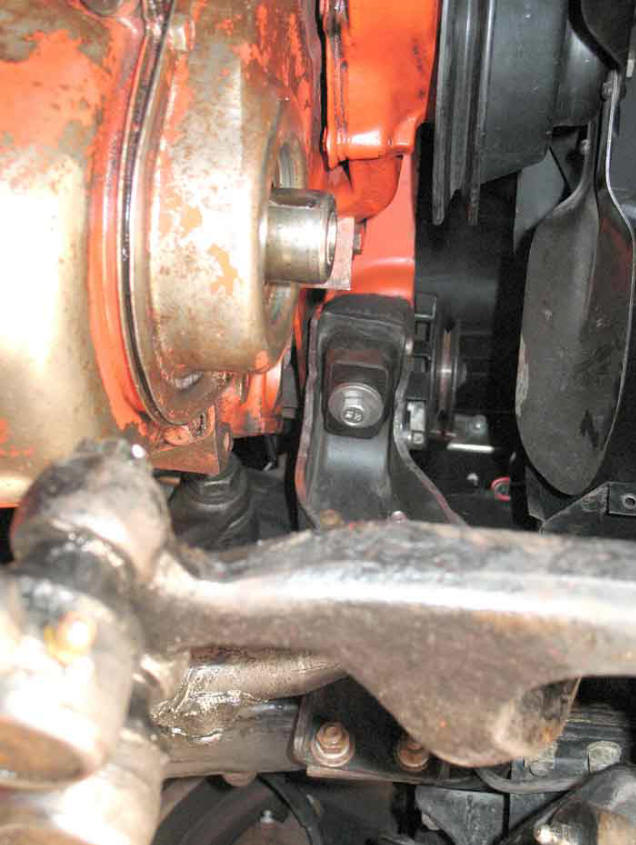
When our cars left the factory the harmonic balancer was pushed onto the crankshaft with an interference fit and had no provisions for a backup bolt! This bolt was added later in the mid 60’s. After the balancer has been off and on a few times over the years, the interference fit erodes to a snug fit that leads to … well: Bing … Bang!!! Pushing the balancer back onto the crankshaft is relatively easy, but drilling and tapping a straight 7/16 thread into a hardened crankshaft with the engine in the car is challenging. (see fig above)
A few things to remember while drilling and tapping the end of a crankshaft without removing the engine:
The crankshafts are carbonized to a depth of about .010, so the first few minutes of drilling and tapping are the most critical.
Buy new quality tungsten drills and 7/16-20 taps.
The one thing you don’t want to do is break a drill and especially not a tap!
You can never use enough tapping oil.
|
 |
|
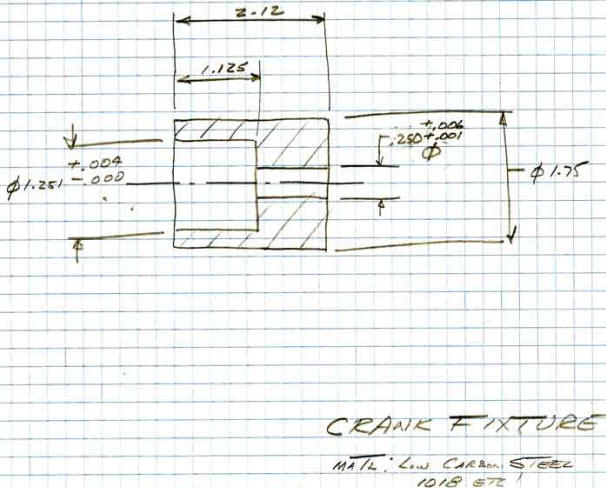
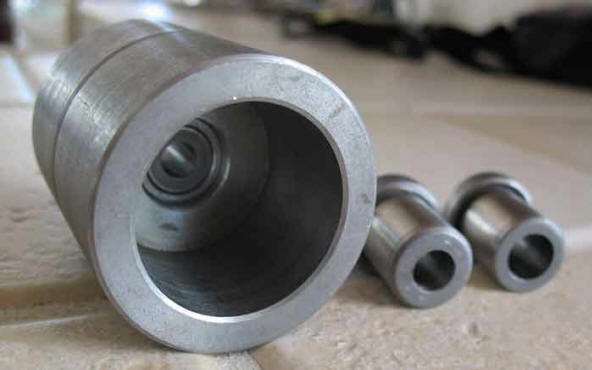
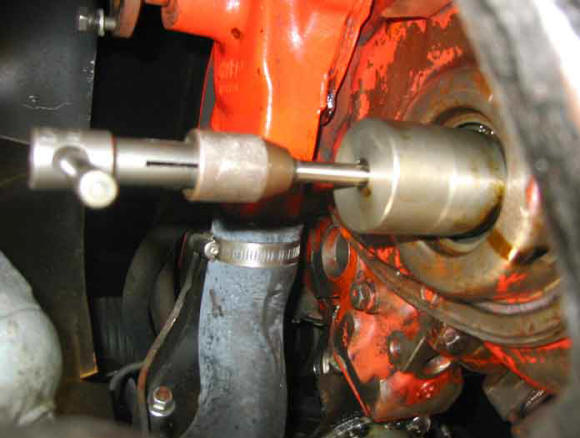
I had a drilling fixture made to my sketch by a local machinist. (see fig above) The initial drill size in the fixture was 1/4” dia. After I successfully drilled the 1st ¼” dia. pilot hole, I drilled the fixture out using a drill press to 5/16’s dia and finally out to the .391 dia. tap drill size (see the figures below for the resulting parts).
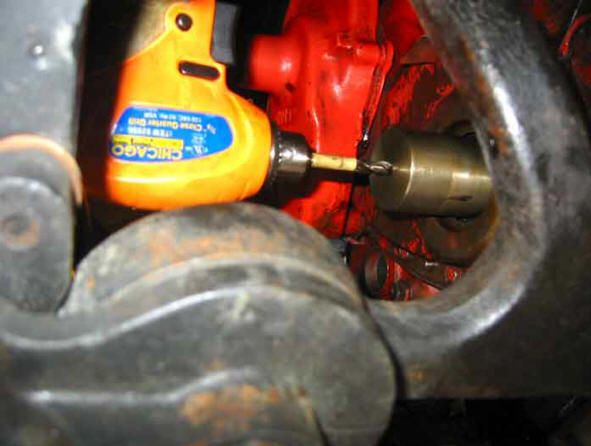
All work was performed from the bottom of the car by only removing the center section of the lower radiator shrouding (60-62 remove drivers side). (see fig below)
|
 |
 |
 |
|
An inexpensive Harbor Freight angle drill motor (not their drills) was used. Note that the drill handle points to drivers side and slightly up when working from underneath.
Remove and discard the old Woodruff key. Remove shaft seal from timing cover.
Use lots of cutting oil, drill about 1/8 deep at a time (I used tape on the drill as a depth gauge), constantly remove the drill fixture, inspect, seal around crank opening and blow out drillings. Re-oil and install tool until tap drill is 1-¼”deep. Drill out fixture to 5/16” and repeat oiling/drilling … then .391 tap drill to a depth of 1-¼”.
Re-drill the fixture to the next size above 7/16 and use the fixture as a guide for the tap. The first two turns of the tap are the nervous ones.
I was able to get 1-1/8” of 7/16-20 full thread depth. (see fig)
|
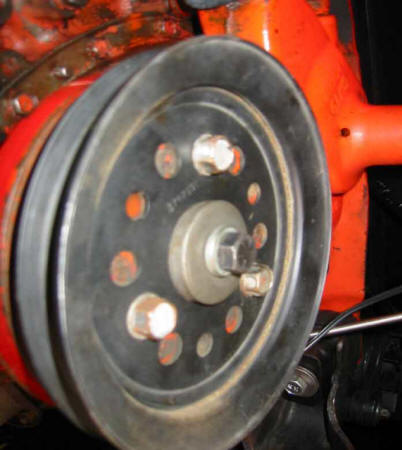 |
I used the replacement washer from Chevrolet but because C1’s used a .16 spacer behind the balancer, I purchased a longer grade #8, 7/16-20 x 2 ½” bolt from a local specialty hardware store instead of the Chevy 2 ¼” bolt.
Replace seal in timing chain cover.
Add Spedi Sleeve (Fel Pro #16202 or equiv) to reconstruct balancer-sealing surface if necessary. Use a new Woodruff key.
Once the crankshaft is threaded, tap the balancer gently onto the crank to get it started and draw it into place making sure that you have at least 3/8” thread engagement at all times … don’t strip your new threads. (see fig )
Fig 6 shows the balancer in place with the new bolt, lock washer and retaining washer.
I have since modified the drilling tool with drill bushings for ¼, 5/16 and .391 drills so that it can be reused (see fig ).
Please contact me with any questions or observations: costales@west.net
|
|
|
|